
Step by Step Guide to At-home Teeth Whitening Kits
A stunning white smile can boost your confidence and make you appear friendlier when meeting new people, as your newly found confidence will help you converse with ease. Unfortunately, things we eat and drink can stain our teeth, and it's often unavoidable. Coffee, tea, wine, and soda are all common beverages that can lead to teeth staining.
But don't worry; you don't have to live with stained teeth. There are ways to get whiter and brighter teeth, even at home. At-home DIY teeth whitening kits can get you a brighter smile in only a few hours.
Here is a complete step-by-step guide to using a Smilie teeth whitening kit at home.
STEP 1: Get Familiar With the Components
When you first get your teeth whitening kit, spend some time getting familiar with the products included. Don't just jump right into teeth whitening. Make sure you know what's included and what each product does.
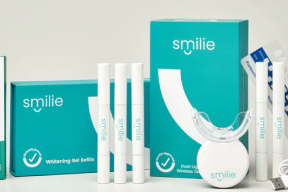
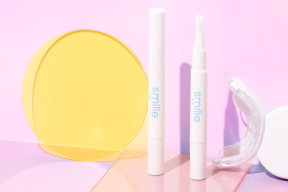
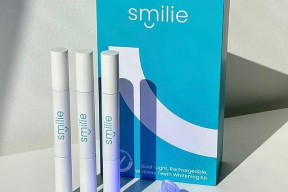
So, what's in the kit? There's a dual-light LED device that activates the ingredients in the whitening gel. There are gel whitening pens that include the whitening solution. Each kit has three pens, which is enough for 30 treatments.
There's also a shade guide to help track your whitening progress. A USB charging cable for the LED device is also included, as are written step-by-step instructions.
STEP 2: Apply the Whitening Gel
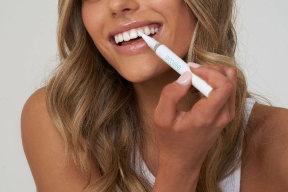
Now that you know what's included, you can get yourself ready to start teeth whitening. You'll start by removing one of the whitening pens from the bottom tray.
Next, remove the cap and twist the pen. You'll start to see the whitening gel appear. Upon the first use, you may need to twist the pen several times. Lastly, you'll want to brush each tooth generously with the whitening gel. Be careful to only apply the gel to the tooth.
STEP 3: Activate the LED Light
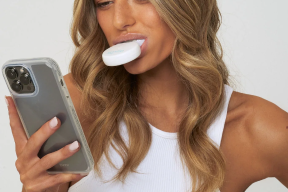
Time to get brighter! Take the LED light device from the tray and turn it on by pressing the button. You'll have to hold this down until the LED light turns on. Once the light is on, place the tray in your mouth.
To hold the tray in place, you may need to bite down on it. But don't bite too hard, and keep your mouth in a comfortable position as you wait for the time to pass.
STEP 4: Relax
The light will stay on for sixteen minutes before turning off automatically. During this time, you can relax and go about some of your normal daily tasks. Read a chapter of your book or catch up on a television show.
You'll want to repeat this process daily for six consecutive days to see the best results. So take a little time in the evenings to relax and whiten your teeth. Once the LED light goes off, that signals the treatment is finished. You can remove the tray, clean it, and store it until the next day.
Common Questions About At-Home DIY Teeth Whitening
Getting brighter, whiter teeth at home may sound too good to be true. But it's totally possible to achieve your dream smile in the comfort of your own living room or bedroom.
But before you try a whitening kit, you might have a few questions. Here are a few common questions that will help you feel more comfortable using a teeth whitening kit.
How Long Will Results Last?
Teeth whitening won't last forever; you'll have to keep up with treatments to keep your teeth remaining white. This is because, as stated earlier, eating and drinking can cause your teeth to stain.
The results from an at-home whitening kit can last a few months if you don't continue using the product. That's why it's important to follow the directions of any product and how often the product recommends using it.
With Smilie's teeth whitening, you should complete the whitening process every two weeks in order to maintain the results.
How to Make Results Last Longer?
Smilie DIY teeth whitening may not be a difficult process, but, of course, you want the results to last and be noticeable. So what else can you do to make teeth whitening results last longer?
Good oral hygiene will always make your teeth look whiter. So if you compliment your Smilie teeth whitening results and make them last longer by maintaining a good oral hygiene routine.
Brush, floss, and use mouthwash twice a day. Try to brush after you eat. You can also reduce consuming staining foods and beverages like sodas, wines, and tomato-based sauces.
Is Sensitivity Normal?
Some people may experience teeth sensitivity after using teeth whitening products. You may be worried that eating ice cream or sipping on coffee suddenly makes your teeth hurt, but this is totally normal and often temporary.
Many teeth whitening products use peroxide as the main whitening ingredient, which can strip the enamel and lead to vulnerable teeth. That's also why those with sensitive teeth or weakened enamel tend to be nervous about using whitening products.
However, Smile whitening products are formulated with sensitive teeth in mind. This teeth whitening formula has desensitisers and soothers to reduce sensitivity.
Are At-home Teeth Whitening Kits Safe?
Yes, teeth whitening is completely safe. People tend to be nervous about teeth whitening, especially when done at home. But when the directions are followed step by step, the teeth whitening process is really safe.
Be sure to use the teeth whitening kit when directed. Overdoing teeth whitening can strip the enamel and be harmful long-term. But if you follow the directions, maintain your oral hygiene, and see a dentist regularly, be assured that teeth whitening is safe.
Your Step-By-Step Guide to At-Home Teeth Whitening
What if you could have your dream smile by the end of the day? With Smilie, you can have exactly that. Our teeth whitening kits have an easy step-by-step process that allows you to have a whiter and brighter smile in minutes.
With continued use, you'll have the brightest smiles around. Smilie at-home teeth whitening will look just as good as when it's done at the dentist's office. You'll be grinning from ear to ear after whitening your teeth with Smile.
Want your best smile yet? Loved by over 50,000 satisfied customers, you could be next. Try a Smilie teeth whitening kit today!
But don't worry; you don't have to live with stained teeth. There are ways to get whiter and brighter teeth, even at home. At-home DIY teeth whitening kits can get you a brighter smile in only a few hours.
Here is a complete step-by-step guide to using a Smilie teeth whitening kit at home.
STEP 1: Get Familiar With the Components
When you first get your teeth whitening kit, spend some time getting familiar with the products included. Don't just jump right into teeth whitening. Make sure you know what's included and what each product does.
So, what's in the kit? There's a dual-light LED device that activates the ingredients in the whitening gel. There are gel whitening pens that include the whitening solution. Each kit has three pens, which is enough for 30 treatments.
There's also a shade guide to help track your whitening progress. A USB charging cable for the LED device is also included, as are written step-by-step instructions.
STEP 2: Apply the Whitening Gel
Now that you know what's included, you can get yourself ready to start teeth whitening. You'll start by removing one of the whitening pens from the bottom tray.
Next, remove the cap and twist the pen. You'll start to see the whitening gel appear. Upon the first use, you may need to twist the pen several times. Lastly, you'll want to brush each tooth generously with the whitening gel. Be careful to only apply the gel to the tooth.
STEP 3: Activate the LED Light
Time to get brighter! Take the LED light device from the tray and turn it on by pressing the button. You'll have to hold this down until the LED light turns on. Once the light is on, place the tray in your mouth.
To hold the tray in place, you may need to bite down on it. But don't bite too hard, and keep your mouth in a comfortable position as you wait for the time to pass.
STEP 4: Relax
The light will stay on for sixteen minutes before turning off automatically. During this time, you can relax and go about some of your normal daily tasks. Read a chapter of your book or catch up on a television show.
You'll want to repeat this process daily for six consecutive days to see the best results. So take a little time in the evenings to relax and whiten your teeth. Once the LED light goes off, that signals the treatment is finished. You can remove the tray, clean it, and store it until the next day.
Common Questions About At-Home DIY Teeth Whitening
Getting brighter, whiter teeth at home may sound too good to be true. But it's totally possible to achieve your dream smile in the comfort of your own living room or bedroom.
But before you try a whitening kit, you might have a few questions. Here are a few common questions that will help you feel more comfortable using a teeth whitening kit.
How Long Will Results Last?
Teeth whitening won't last forever; you'll have to keep up with treatments to keep your teeth remaining white. This is because, as stated earlier, eating and drinking can cause your teeth to stain.
The results from an at-home whitening kit can last a few months if you don't continue using the product. That's why it's important to follow the directions of any product and how often the product recommends using it.
With Smilie's teeth whitening, you should complete the whitening process every two weeks in order to maintain the results.
How to Make Results Last Longer?
Smilie DIY teeth whitening may not be a difficult process, but, of course, you want the results to last and be noticeable. So what else can you do to make teeth whitening results last longer?
Good oral hygiene will always make your teeth look whiter. So if you compliment your Smilie teeth whitening results and make them last longer by maintaining a good oral hygiene routine.
Brush, floss, and use mouthwash twice a day. Try to brush after you eat. You can also reduce consuming staining foods and beverages like sodas, wines, and tomato-based sauces.
Is Sensitivity Normal?
Some people may experience teeth sensitivity after using teeth whitening products. You may be worried that eating ice cream or sipping on coffee suddenly makes your teeth hurt, but this is totally normal and often temporary.
Many teeth whitening products use peroxide as the main whitening ingredient, which can strip the enamel and lead to vulnerable teeth. That's also why those with sensitive teeth or weakened enamel tend to be nervous about using whitening products.
However, Smile whitening products are formulated with sensitive teeth in mind. This teeth whitening formula has desensitisers and soothers to reduce sensitivity.
Are At-home Teeth Whitening Kits Safe?
Yes, teeth whitening is completely safe. People tend to be nervous about teeth whitening, especially when done at home. But when the directions are followed step by step, the teeth whitening process is really safe.
Be sure to use the teeth whitening kit when directed. Overdoing teeth whitening can strip the enamel and be harmful long-term. But if you follow the directions, maintain your oral hygiene, and see a dentist regularly, be assured that teeth whitening is safe.
Your Step-By-Step Guide to At-Home Teeth Whitening
What if you could have your dream smile by the end of the day? With Smilie, you can have exactly that. Our teeth whitening kits have an easy step-by-step process that allows you to have a whiter and brighter smile in minutes.
With continued use, you'll have the brightest smiles around. Smilie at-home teeth whitening will look just as good as when it's done at the dentist's office. You'll be grinning from ear to ear after whitening your teeth with Smile.
Want your best smile yet? Loved by over 50,000 satisfied customers, you could be next. Try a Smilie teeth whitening kit today!